Installation Guide
1. Pre-installation Preparation
- Before installing C&I Energy Manager, please carefully check whether the shell is deformed or has water ingress.
- Before powering on, carefully inspect the wiring harness for signs of deformation, damage, or connector damage. Connect the wiring harness according to the following instructions to ensure each node is securely connected.
warning
Please ensure that the PE terminal is firmly grounded and the grounding resistance is less than 0.1Ω. Otherwise, there will be a huge risk of current leakage and safety hazards.
2. Install EMS
The installation dimensions of the equipment are shown in the figure below (unit: mm):
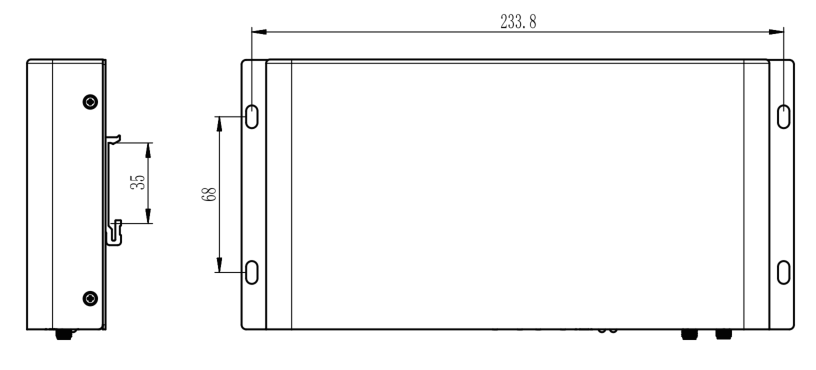
Please select the corresponding installation method according to your specific deployment environment and requirements.
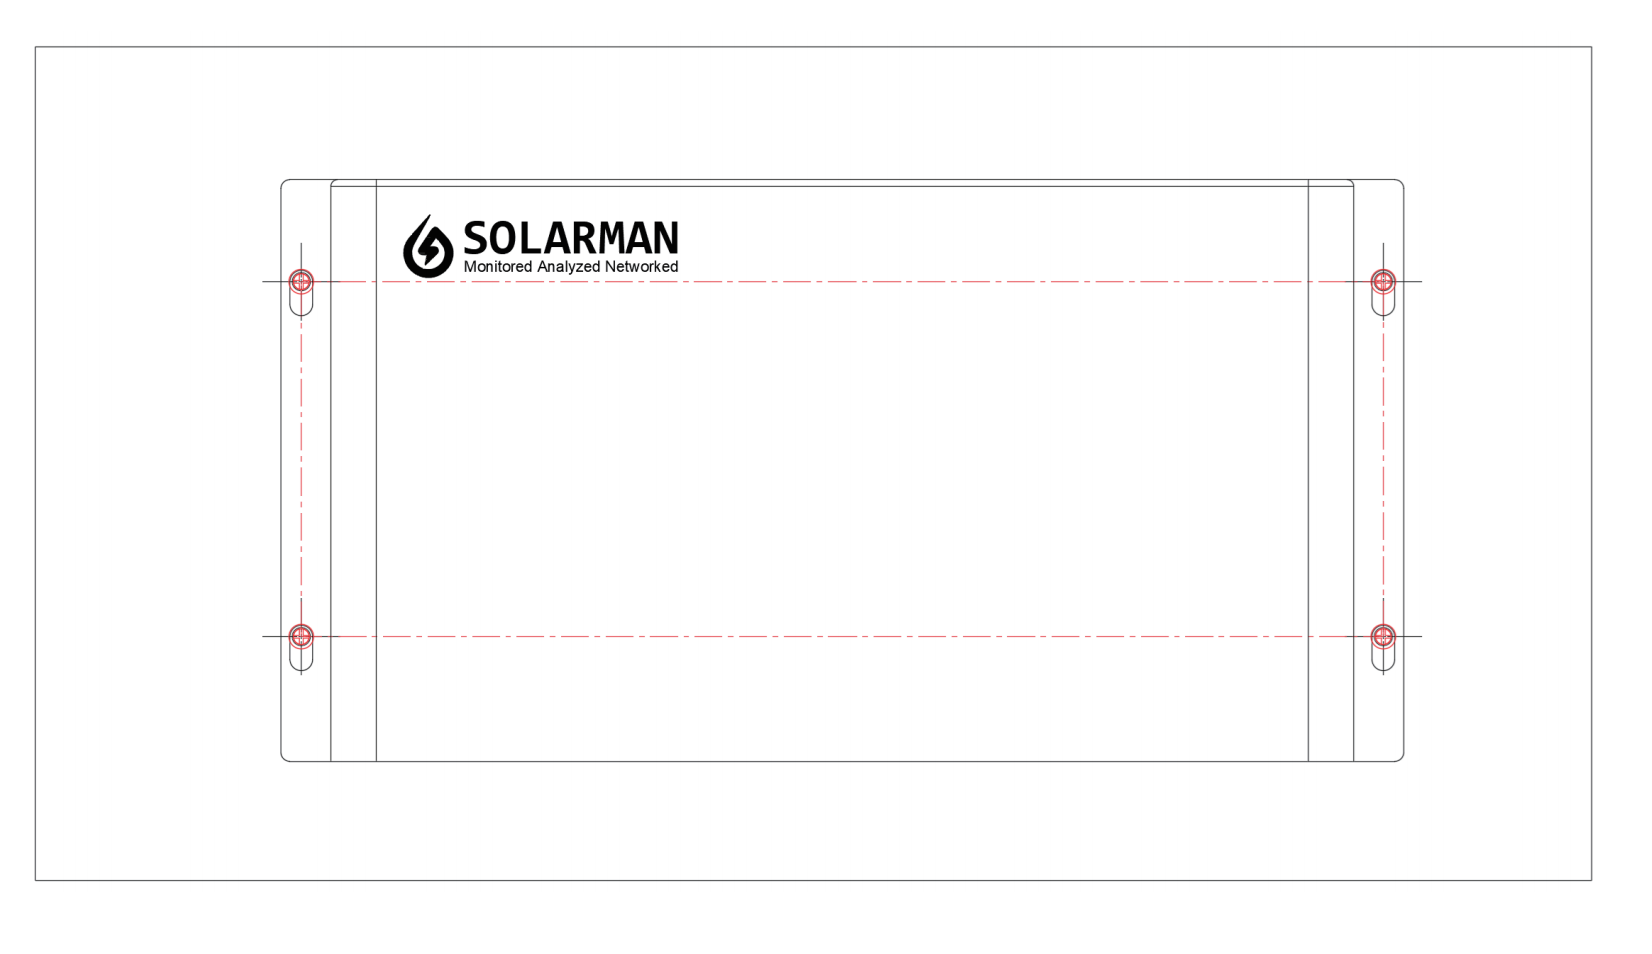
2.1 Direct Installation
Use the mounting brackets on both sides of the bottom of C&I Energy Manager to install it on the electrical installation plate with pre-drilled threaded holes (M4), with the interface facing downward.
2.2 Wall-mounted
- First, use a 6mm impact drill bit to drill a hole in the wall to a depth of more than 30mm.
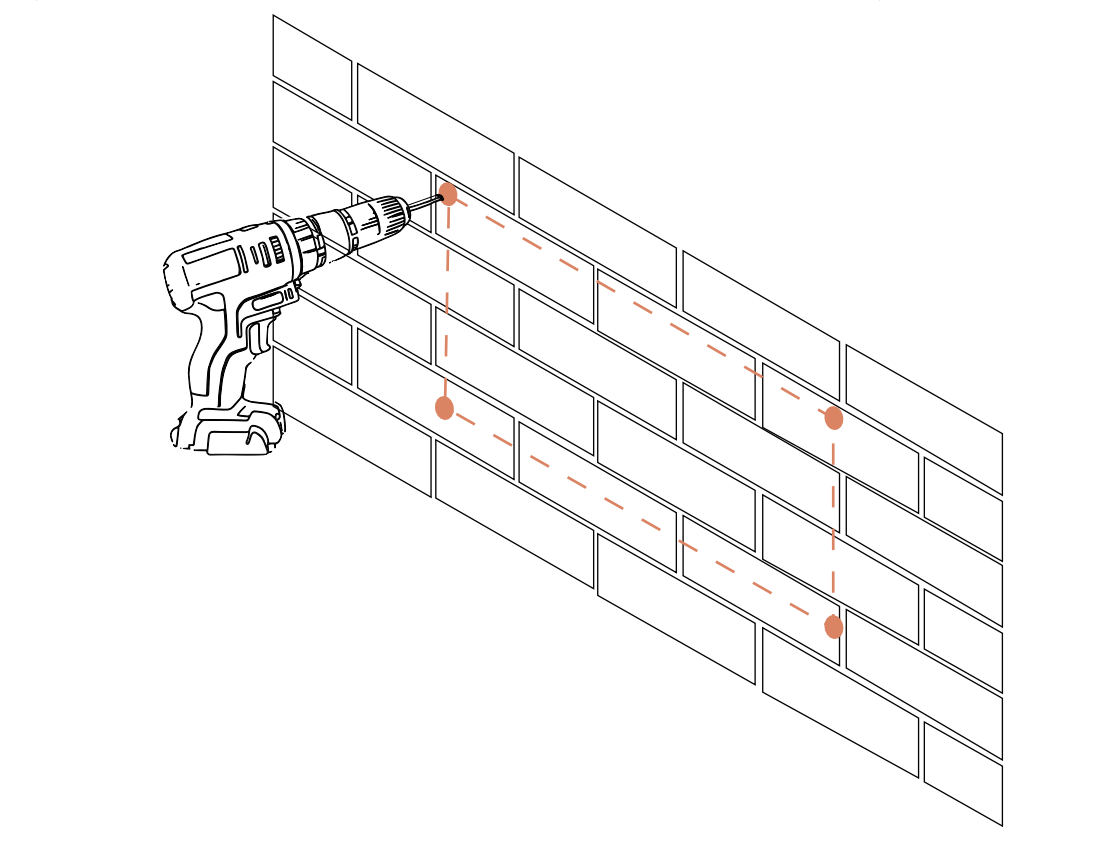
- Then, knock in the expansion plastic tube, making sure that the expansion plastic tube is completely embedded in the wall.
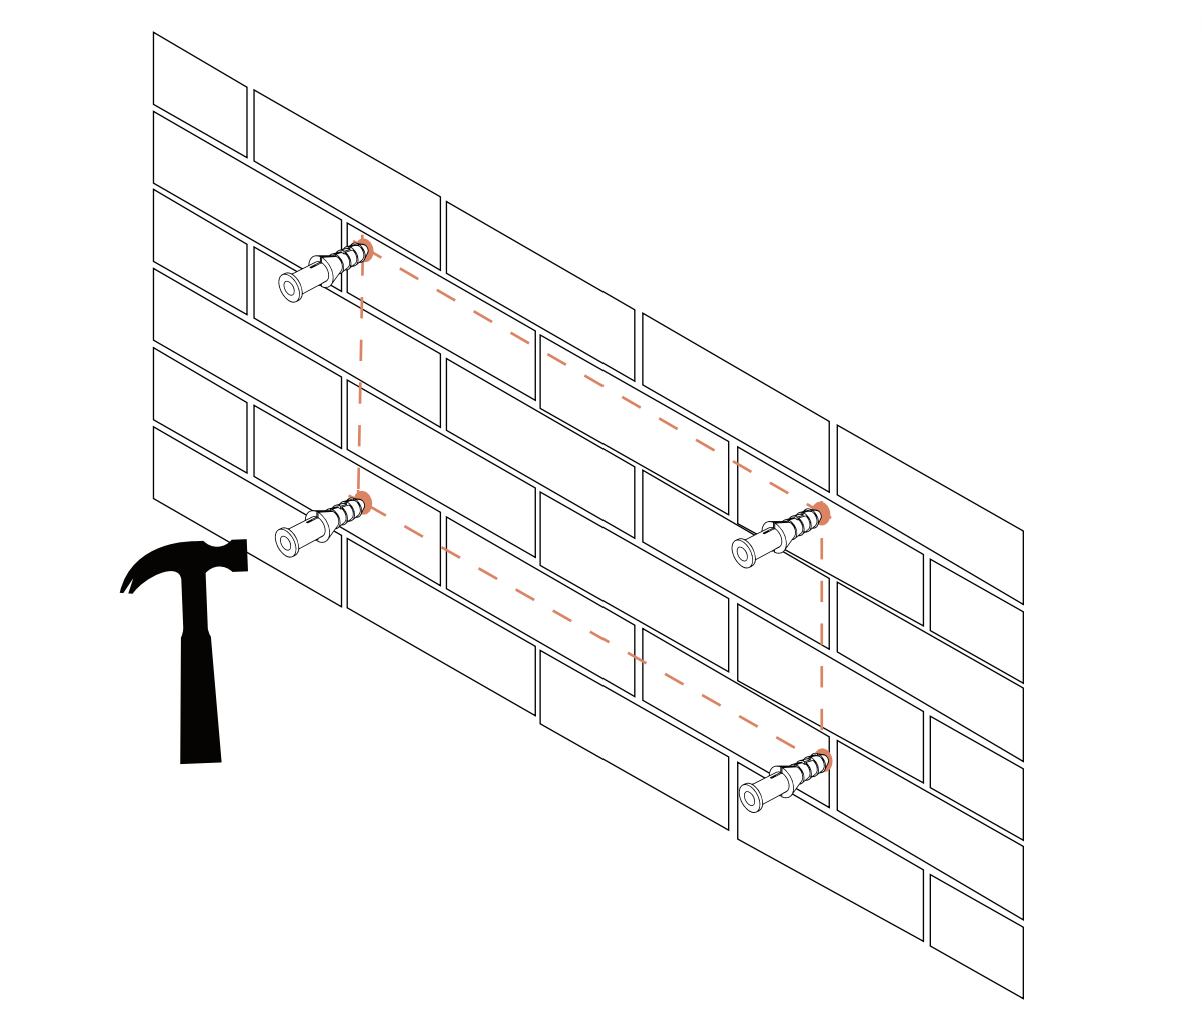
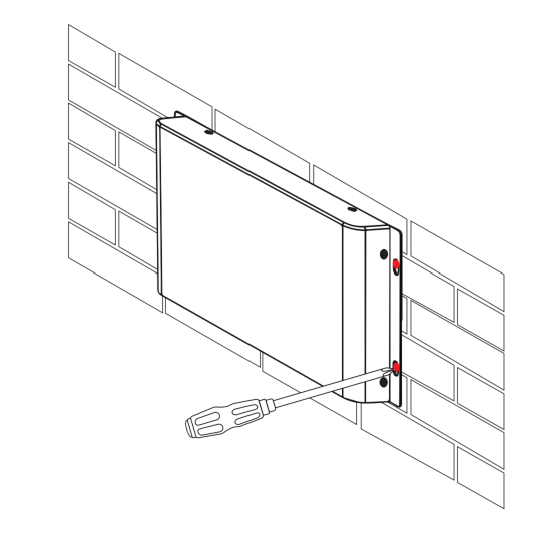
- Use the mounting brackets on both sides of the bottom of C&I Energy Manager to fix it to the wall with self-tapping screws (M4), with the interface facing downward.
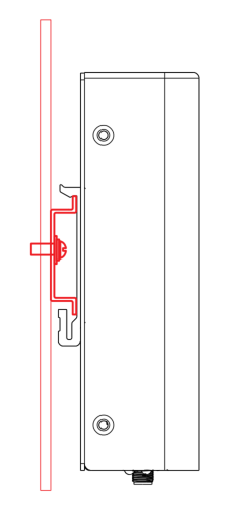
2.3 Snap-on
- Remove the mounting brackets on both sides and snap the guide rails in the mounting accessories onto the back of C&I Energy Manager.
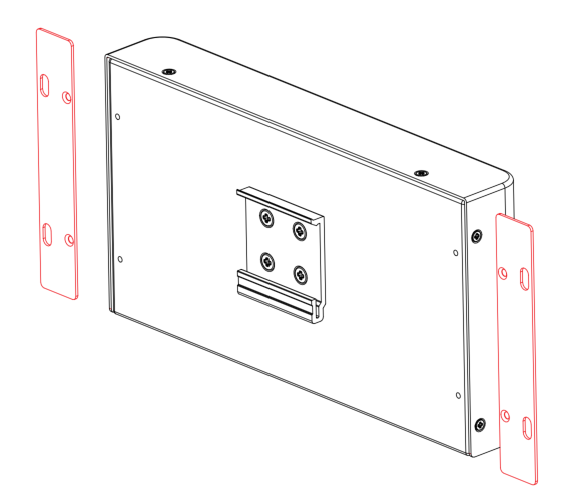
- Install C&I Energy Manager on a TH35-7.5 guide rail with the interface facing downward.